Enscape Toolbars #

| Tag | Tool Name | Tool Function |
| 1 | Start Enscape | “Play button”, starts Enscape viewer in separate window |
| 2 | Live Updates | Toggles updates to automatically show model updates |
| 3 | Synchronize Views | Allows cameras to move in sync from SketchUp to Enscape |
| 4 | Active Document | Tells you which SketchUp document is currently open in Enscape |
| 5 | Enscape Objects | Use this to place light & sound sources (not fixtures) |
| 6 | Asset Library | People, objects, plants, furniture, fixtures, etc. |
| 7 | Material Editor | Edit material properties (displacement, reflectivity, opacity, tint, etc.) |
| 8 | Upload Management | Where panoramas & 360º VR exports go |
| 9 | General Settings | Enscape settings for the overall program |
| 10 | Feedback | Send feedback for support here |
| 11 | About | Check version of Enscape here |
| 12 | Enscape Account | Manage login and license here |

| Tag | Tool Name | Tool Function |
| 1 | Home Mode | |
| 2 | Collaboration Annotation | Adds notes for collaboration (not used) |
| 3 | BIM Mode | Shows model components (not used) |
| 4 | View Management | Manages created scenes |
| 5 | Asset Library | May not exist for Mac, can directly place Enscape assets into view window (will show up in the model) |
| 6 | Site Context? | |
| 7 | Video Editor | Place & edit camera path for vieos here (can also adjust time of day per shot here) |
| 8 | Screenshot | “Render” button, exports final render scenes based on Visual Settings & in location specified in Visual Settings |
| 9 | Batch Render | Export multiple views at once with the same Visual Settings for all |
| 10 | Panorama | Mono (standard) or VR (360º) panoramic views exported here |
| 11 | Web Standalone | Export project for online viewing without Enscape plugin downloaded |

| Tag | Tool Name | Tool Function |
| 1 | Minimap | Interactive floor plan of model to move around in/locate yourself |
| 2 | Safe Frame | Limit visible area to projected rendering result |
| 3 | Projection Mode | Toggles between perspective, 2-point perspective, and orthographic modes |
| 4 | Navigation Mode | Toggles between fly and walk mode (only fly mode can go through walls, walk mode is moved with WASD keys) |
| 5 | VR Mode | Toggles on/off VR view seen in headset |
| 6 | Visual Settings | Adjust visual preferences for final render here (sky, sun brightness, model style, etc.) |
| 7 | Enscape Window Settings | Movement & mouse preferences adjusted here |
| 8 | Help | Controls & toolbar descriptions |
SketchUp to Enscape Workflow #
Before Starting Enscape #
1. Set Up SketchUp Scenes Properly #
Make sure to use sections in SketchUp to hide and crop items not in view for the final rendering output in Enscape. This will help your model load faster and rendering export time be shorter.
- Hide things you don’t need/want to see in view
- Use sections to make views load faster in Enscape window
- Ensure all encessary walls/floors/ceilings are modelled & showing
- Number the scenes (in their names) in the order you want them recorded; no jumping around in the building, just smooth movements from room to room
2. Assign Material IDs #
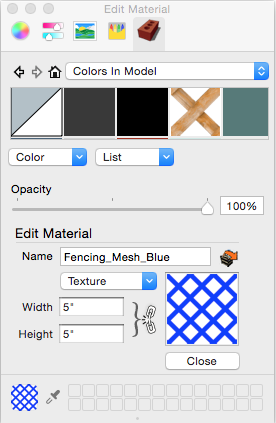
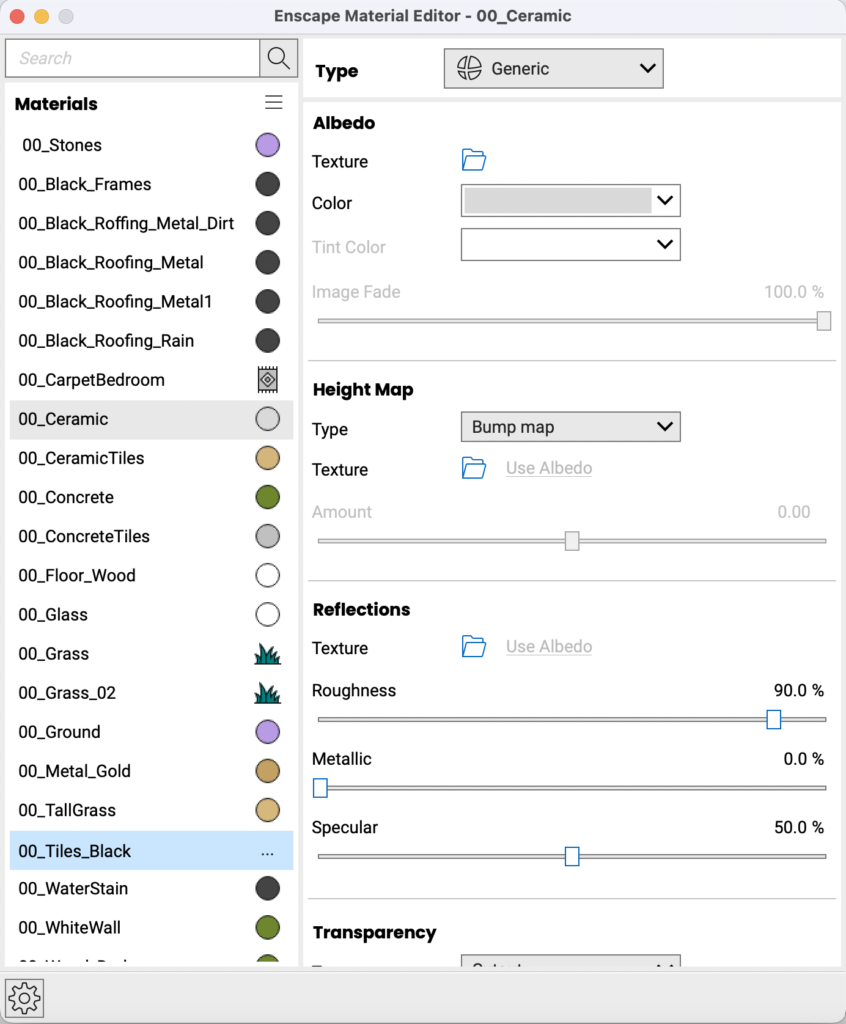
- Can be color name, but not everything that is colored white can be called “white”
- All materials with the same material name will be adjusted if/when the “white” material is adjusted (i.e., made metallic, glowing, transparent, cut-through, etc.)
3. Populate with SketchUp & Enscape Assets #
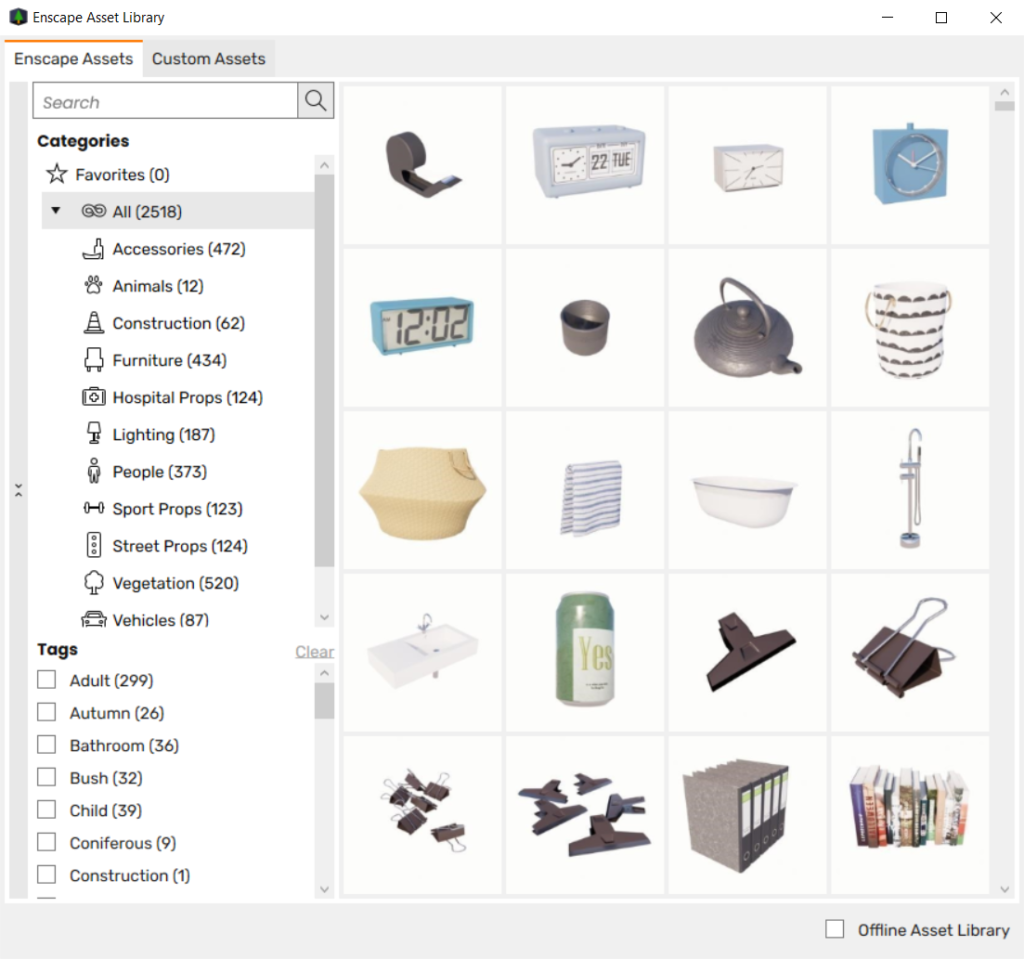
Utilize the existing SketchUp asset library located on the server (Shared > Standards > Drawings & Presentations > SketchUp > Model Assets).
Try not to use items from the 3D Warehouse, as many of those will have larger polygon counts, and will therefore bog down your model and make it slower. If you must use something from the 3D Warehouse, make sure to check the number of polygons in the model and try to choose the smaller polygon count models.
4. Place Light Sources in Dark Areas Before Opening Enscape #
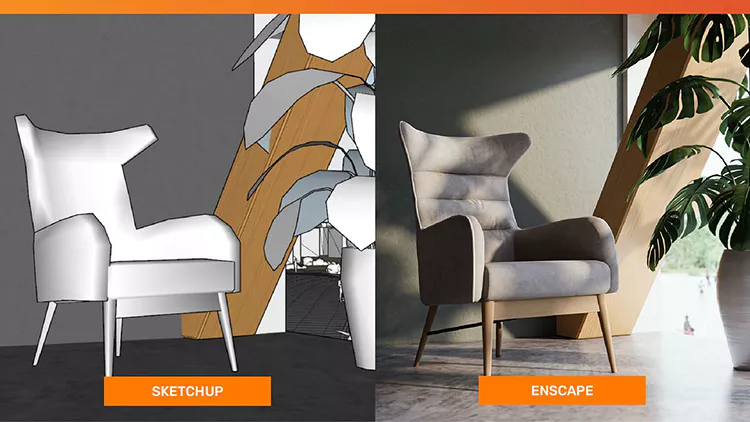
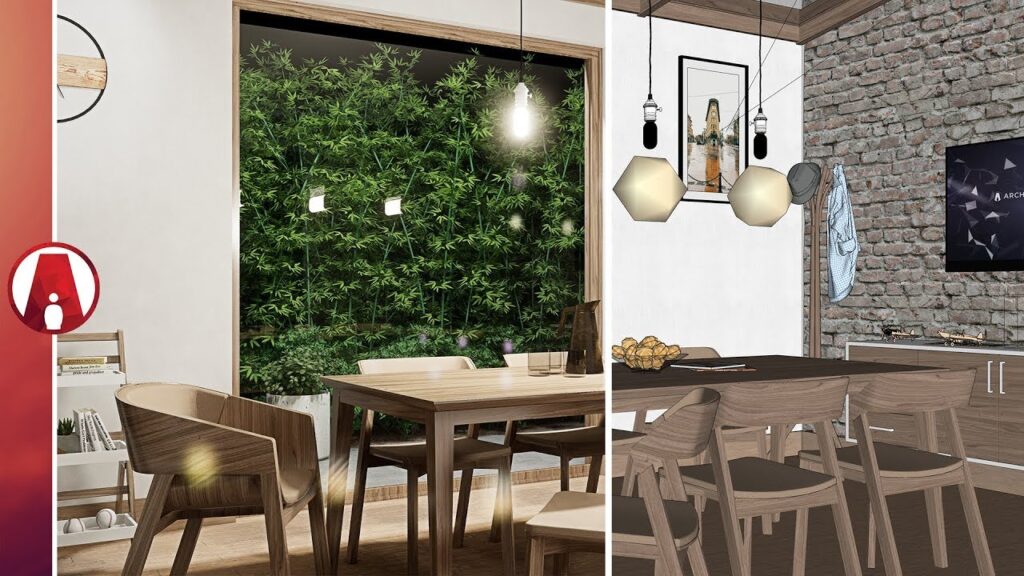
Open up Enscape to see how “lit up” your model is for interior shots. Rooms without windows will obviously be darker, so make sure to place light sources (Figure E.1, no. 5) to subtly light up the room. Close out the Enscape window before placing the light sources in order to make the model render the adjustments faster when you open it back up again. having both windows open at the same time will cause the program to crash.
Here is a good, short (6 minute) video on Enscape lighting tips & tricks for SketchUp.
5. Check Model for Z-Facing #
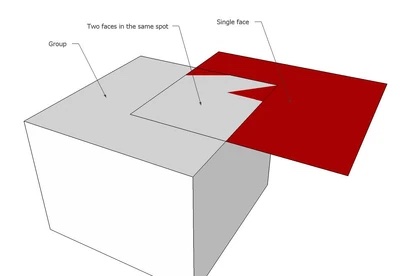
Open Enscape window to double check for any Z-facing (materials on top of each other “blinking” in model, fighting for which one is on top & showing in view)
6. Allow for Enough Rendering Time #
Always allow one full work day to render & finish model work before deadlines. Rendering is very stressful work for both the designer and the computer with which the rendering is being processed, and therefore needs more processing times.
Please discuss with your Project Team Leads for proper timeline expectations before major deadlines.
Starting Renderings #
Check Enscape Window Settings (Figure E.3.6, no. 6) #
Adjust mouse speed, movement speed, navigation mode (walking vs. flying), & ensure default spectator height is at acceptable height (default should be at 1.68 m = 5′-5″)
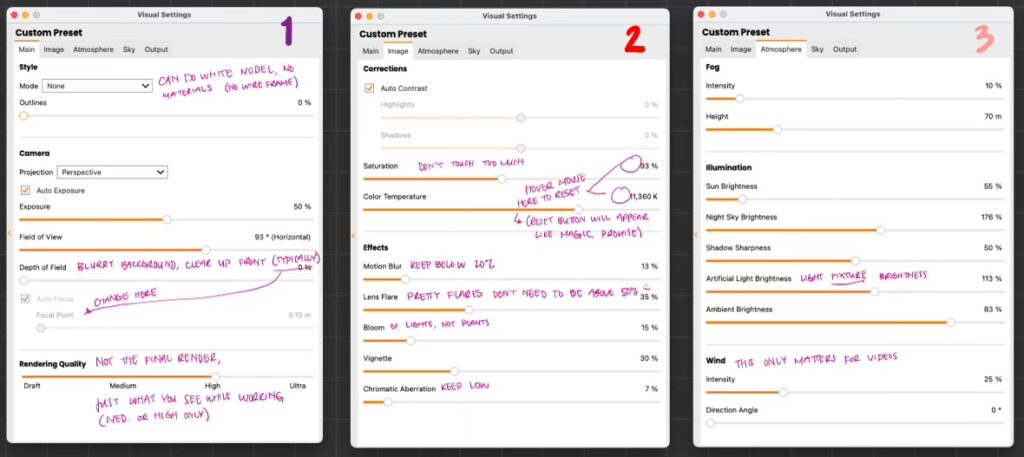
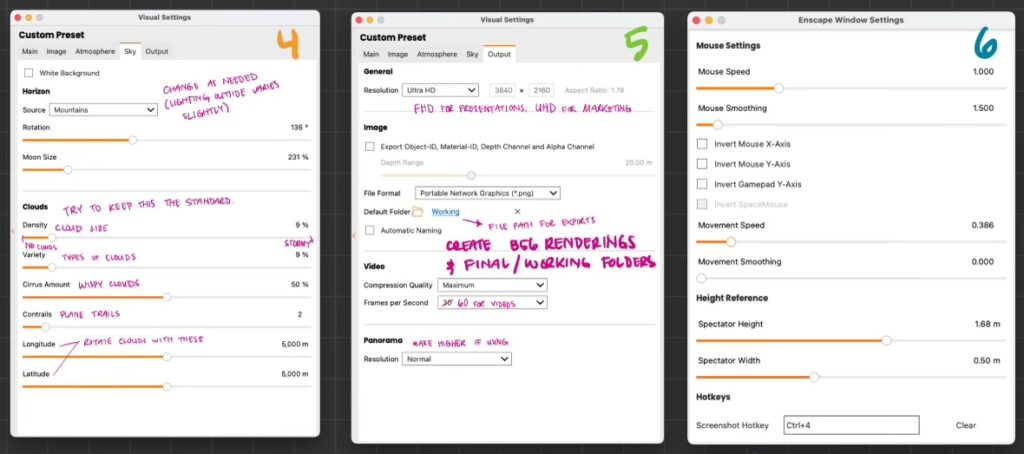
Check Visual Settings (Figure E.3.6, no. 1-5) #
Adjust as needed*, required**
1. Main Tab (Figure E.3.6, no. 1) #
- Mode/Style* (dependent upon phase: SD vs. DD level renderings)
- Percentage of outlines* (max at 8%)
- 2-point projection**
- Auto exposure turned on**
- Depth of field & focal point*
- Field of view* (max at 100)
- High quality rendering window view** (this is for the viewing window, not the final output)
2. Image Tab (Figure E.3.6, no. 2) #
- Auto contrast**
- Motion blur, bloom, vignette, & chromatic aberration** (keep below 20%)
- Lens Flare* (max at 50%)
3. Atmosphere Tab (Figure 3.6, no. 3) #
- Lower fog settings only for exterior night renderings**
- Sun brightness* (max at 100%)
- Night sky brightness = 150%**
- Shadow brightness = 50%**
- Artificial light brightness* (max at 125%)
- Ambient brightness* (max at 100%)
- Wind settings only matter for videos
4. Sky Tab (Figure E.3.6, no. 4) #
- Leave white background off unless for SD or conceptual**
- Horizon source* (choose most accurate background setting, this will change the sunlighting conditions)
- Rotation* (rotates the background if visible through any windows in the rendering)
- Moon size* (more important for evening/night renderings, does affect night lighting)
- Clouds* (max 25%)
- Variety* (max 25%)
- Cirrus Amount* (max 75%)
- Contrails* (max 4)
- Longitude & Latitude* (rotate the clouds with these)
5. Output Tab (Figure E.3.6, no. 5) #
- Resolution* (Full HD for presentations, Ultra HD for marketing renderings)
- Keep ID & channel maps unchecked** (unless for marketing renderings & photo-matching into location)
- File format: PNG**
- Default folder* (this is where you choose the default file save location)
- Keep automatic naming unchecked**
- Video compression quality: Maximum**
- Frames per Second: 60**
- Panorama resolution: Medium/high**
Using View Manager to Change Scenes #
- Turn on Synchronized Views in SketchUp window (Figure E.1, no. 3) to move around in SketchUp & see the camera changes in Enscape (does not work vice versa, if moving around in Enscape to change SketchUp view)
- Hover to the left of the name in View Manager in Enscape window, click the pencil icon to override that scene’s individual sunlighting settings
Exporting Renderings #
Single Rendering Exports #
Single rendering exports (one by one) are recommended if you have not overridden each individual scene’s different sunlighting settings in the View Manager
Batch Rendering Exports #
Batch rendering exports can export multiple views all at once, but will use the same sunlighting settings (if not individually overridden in View Manager)
Panoramic Views #
360º panoramic views are similar to this example, and can be uploaded online via the Upload Management window (Figure E.1, no. 8) to a link with a QR code. The codes can be included in the Notes section of the presentation document for the client to scan and view on their mobile devices during the meeting. This can be particularly helpful for when VR is not being used during a client meeting.
360º panoramic views can only be exported when in regular perspective mode, not 2-point projection. Synchronized Views must also be turned off from the SketchUp window
Where to Save Renderings #
Renderings should be saved to B56) Renderings, NOT in the B52) SketchUp folder.

